So, let's get started.
Open up Hammer through the Source SDK under Tools in Steam. You have to have at least one Source game, of course.
When Hammer opens, push CTRL-N and you'll see this.

I've marked some of the options in the screenshot, but I'll detail them more in depth later.
For now, click on the white cube on the options. Or hit Shift-B. This is your brush tool. Brushes are all the things that you see in source games that aren't models. Essentially all the boxes and everything are called brushes.
Now, draw a square like this.

Before you hit enter, click on the browse button on the texture browser on the right side of the screen. Then type in 'grass', or whatever you want. Find a texture and double click it.

Now hit enter. You should see something like this.

If you hover over the textured 3d view and hit Z you can fly around with WASD and the mouse.
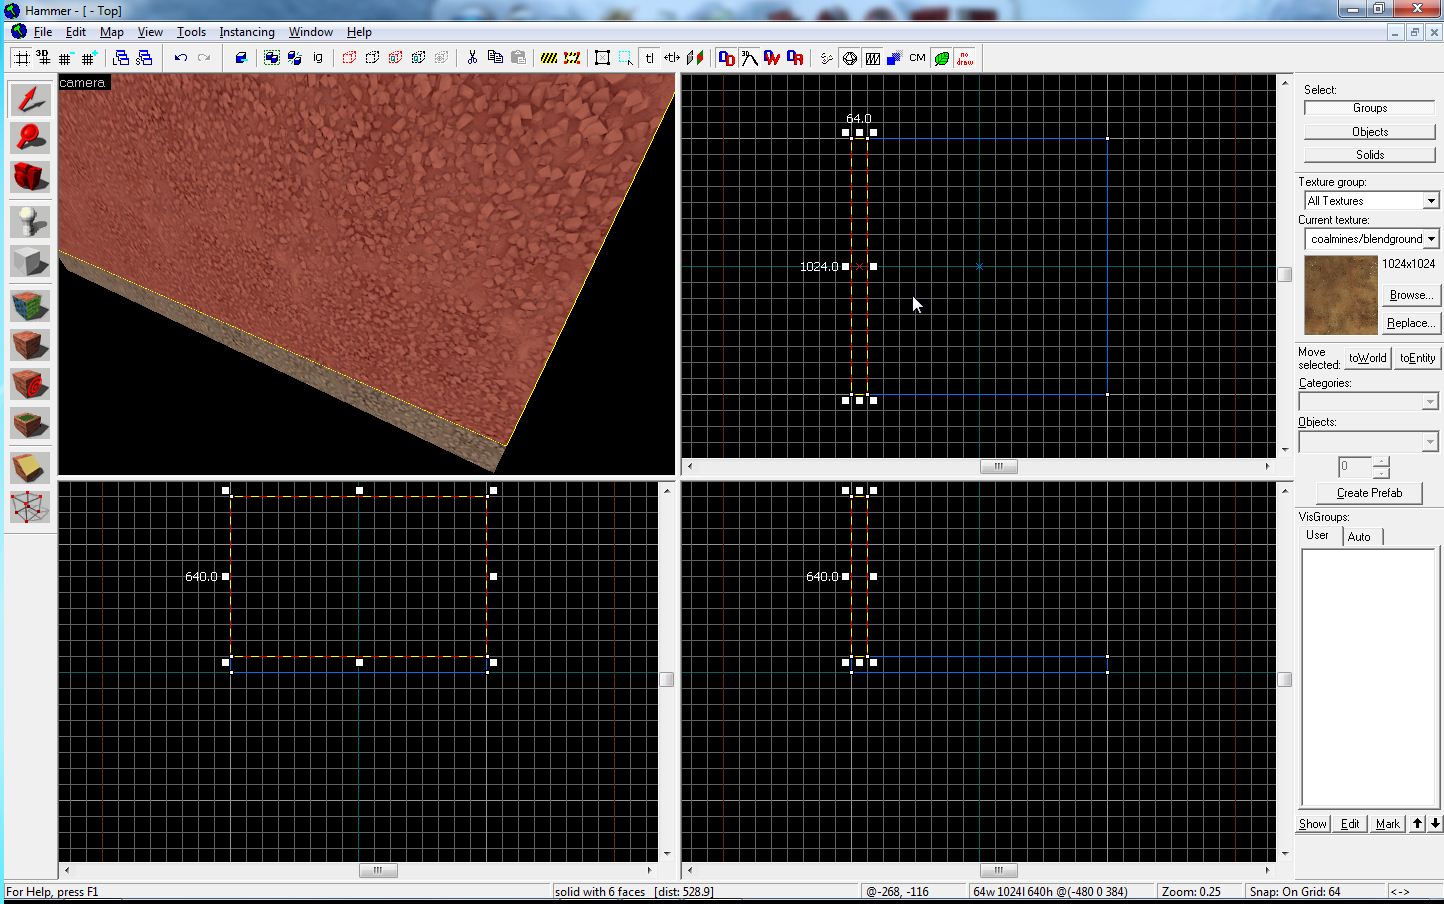
Now, draw another square, but in a different view, so you won't be drawing from the top. Like so.

Hit enter and you'll have your vertical brush.
Let's make a basic room. The only other thing you need to know to make a room is the Shift-S tool. It's also the red pointer on the options menu. This is the selector tool, it allows you to move brushes around and to resize them and stuff.
Take our previous vertical brush and stretch it out so it covers one side of the floor.
Pretty simple, no? Hopefully it is, otherwise...well, yeah.
Anyway, let's make the other walls for our room. Being a programmer, I like shortcuts, so I tend to use keyboard shortcuts a lot, which is why I recommend using the hotkeys for the tools, like Shift-B and whatnot.
You can duplicate an existing brush very easily. To do it, just select the brush with the selection tool (Shift-S) and hold down Shift and drag the brush somewhere else.

Use this to make the rest of your walls, it makes everything really easy.
Now that you've made your walls, you should have something that looks something like this.

Okay. Now for the fun stuff, let's make the floor a different texture than the walls. Having everything be one texture is boring as hell. It's really simple to change the texture of a brush, just open up the texture browser by clicking Browse, find a new texture, try 'floor'. Then select the brush you want to change the texture of, and click this option.

Your floor should now be a different texture than your walls.

Now, copy the floor up to the top of the walls to make a ceiling. On your maps, make sure that, from inside the map, you can NEVER see the blackness of outside the map. If you can, it's called a leak. It will prevent optimization calculations from running, and your map will run badly.
Oh, you can move the wireframe side views around my hovering over it and pushing the arrow keys, or hovering over it, hold space and left-click dragging. Either way will work.
After you've made your roof, it's time to make a place for your players to spawn. For this, you need an entity. To place entities, hit Shift-E or the little white marker-looking thing. You'll then see this panel light up.

By default, the entity used to spawn players is always the first one to come up. So info_player_teamspawn is what you use to spawn players in TF2.
To place the entity, use the textured view to fly into your room, and click somewhere on the ground. This will create the entity where you clicked.

If you want to customize the options of any entity, make sure it's selected, then double click on it in the textured view, or hit Alt-Enter. This will bring up the properties menu.

Most options are pretty self-explanatory, so feel free to mess around with them.
Now, how to compile your map. It's really very simple, hit F9. You'll see this.

You can use my settings to test your maps, but if you want to release a map, make sure that Run VIS and Run RAD are both on Normal, not fast. It's slower, but it increases performance in-game. Also make sure that the 'Don't run game after compiling' checkbox is ticked, unless you want the game to run after you compile; in that case, leave it unticked.
Then hit OK and your map will compile. You'll see this window pop up and text will appear. It'll look like this when it's done.
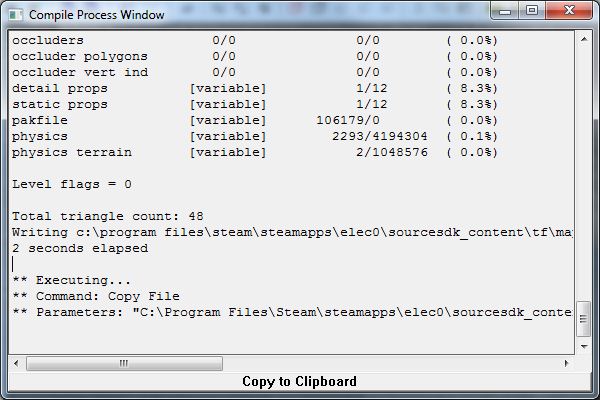
Then just load up your game and click 'Create Server' and find your map. Oh, you'll have to save it before you compile it, but that's as easy as entering a name and hitting enter.
That's it for now, hope you learned something. If you've got any questions, post a comment, message me on Steam, whatever.
~Elec0
Video tutorial:
0 comments:
Post a Comment